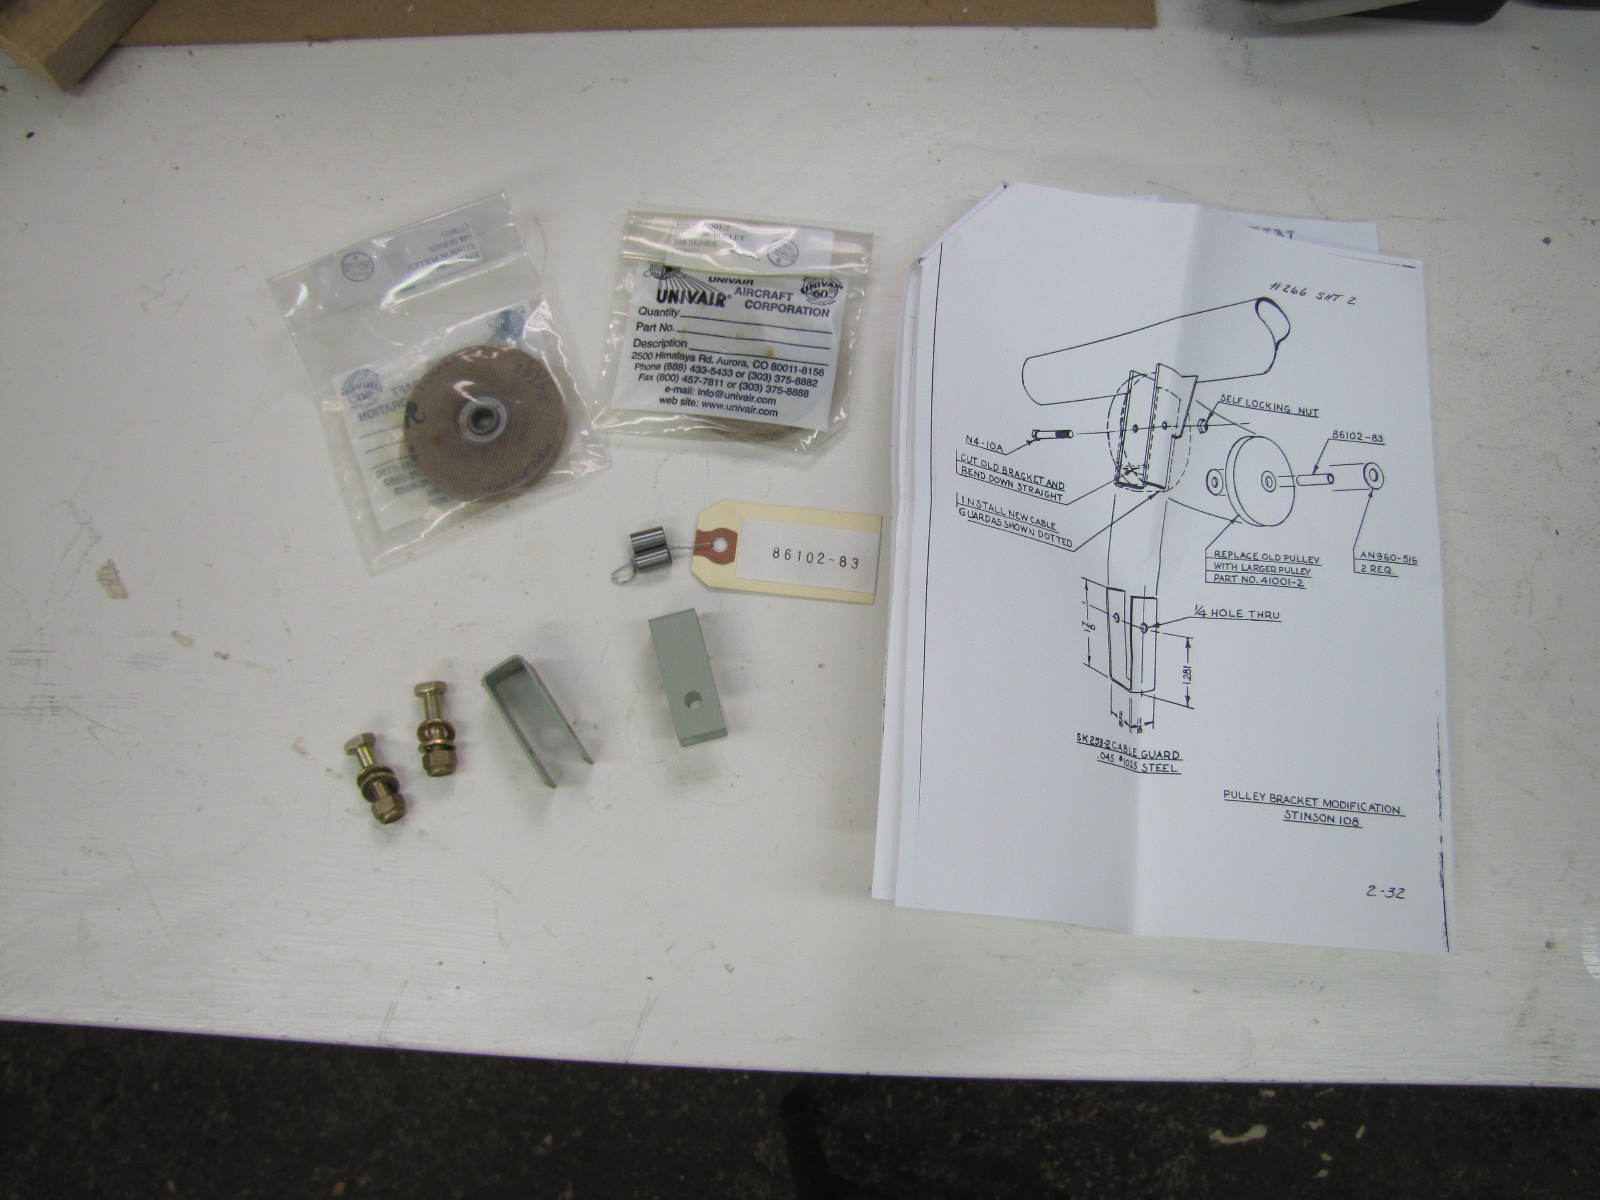
Following the AD directions I had to cut the existing front pulley bracket and bend the ends straight. However, I found that the bent tabs needed to be filed shorter because the new pulley cable guide holes did not line up with the existing bolt holes in the bracket.

Fitting the whole assembly together also produced another problem; the weld fillets on one side of each bracket were preventing the pulley from spinning freely when installed. I had to put the bracket and pulleys on and off as I filled a small amount of the weld fillet to allow the pulley to rotate.


I'll have to go back and touch up these filed areas with primer, but for now, the pulley rotates freely and works well. I went ahead and hooked up the rudder cables not knowing exactly their route and installed the rest of the rudder pulleys aft. Studying the parts manual and other docs I found the correct rudder cable routing and finished it off by temporarily installing the rudder to get some degree of tension on the rudder cable system.


With the rudder cables installed I noticed the cables rubbing on two areas of the frame. There are holes located on each side of the cable which indicated there must have been a friction material to prevent the frame being sawed into by the cables. I looked at the disassembly photos for evidence of what these are but didn't find them so I commenced a search for possible parts in my assorted parts boxes and found the former parts which are a phenolic-type material. I thought to buy new, but found they were in good shape and could be remounted by turning them around to an unworn spot. I believe these are mounted with screws, probably drive screws which I found I had the correct size so I installed one to see how it looked.


Keeping with the rudder theme, I moved onto installing the rudder cable bungee system my cousin had already purchased for the rebuild. I had the installation kit and blueprints which I consulted as I installed the system. I had to drill new holes into the elevator push/pull pivot bracket. Reading the installation instructions it says the bolt heads must be on the inside but it did not say where the washers should be placed. I found the clearance inside the bracket was very tight and it took several times of installing the bracket with various configurations before I found the right one that allowed free pivoting of the the elevator bracket. I finished up the evening with the install of the cables but did not tighten them fully or install the safety wire (because I need to buy it still).


This weekend saw the most progress on getting things off the bench and onto the aircraft. It really feels like an airplane now that I can manipulate the rudder with the rudder pedals and cables that I installed. Next I'll install the rudder and elevator trim controls and cables and then move on to another system I haven't decided what yet.
No comments:
Post a Comment